My husband K has begun gleefully introducing our two-year-old son Dexter to all things geek. You cannot imagine how disconcerting it was for me to hear a two-year-old Dexter suddenly chirp up in the car, "Mommy, Enterprise shooting the Reliant" (from Star Trek II: The Wrath of Khan). Uhhhh, what?
Anyway, DC comic book superheros have become another source of interest for Dexter, which is why I just had to make him his own Superman cape. The problem is that my sewing machine and I don't quite get along because I'm, uh, not so good with making exact measurements. Luckily, a cape doesn't have to fit perfectly, so there's a lot of room for fudge. Here are straightforward step-by-step instructions you can use to make your own:
Materials
- Sewing supplies
- Sewing machine
- Fabric scissors
- Measuring tape
- Pencil or tailor's chalk
- Fabric (I got regular 100% cotton from Walmart)
- 2 yards of fabric for the cape (each yard can be a different color if you want to make a reversible cape)
- A fat quarter or small amount of scrap fabric for the logo
- All-purpose thread (matching the cape and logo colors)
- 2 inches of sewable Velcro
- Sewable fusible web, enough to encompass the logo (I recommend the purple Heat n Bond Lite stuff)
- Plate, bowl, or other circular object with an 8" diameter
- X-Acto knife
- Ruler
- Iron
Measuring and Cutting the Cape
Before starting, make sure to wash and dry the fabrics to preshrink them. You can iron them afterward if the fabrics came out very wrinkled. The following measurements were based on this article from How Does She?
1) Cut your cape fabric in half so that you have two halves that are about 31" in width.
2) Place the two halves on top of each other and then fold them in half lengthwise so that the 31" width edges are at the top.
3) On the right edge, make a mark 5 inches from the bottom. On the left edge, make a mark 11 inches from the bottom. Using the pencil or tailor's chalk, draw a straight line between the two marks. Cut the fabric about 0.5" above the line you just drew (this extra fabric is the seam allowance).
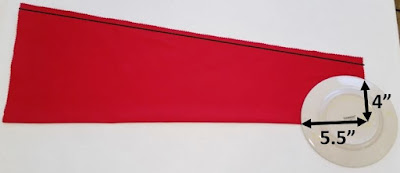
This is what you should end up with. (I drew a black line just to make it more visible for you, but the pencil or chalk line should be fainter and will wash away.) If it helps, you can draw a second line 0.5" above your previous line and then cut along the second line.
4) Take your 8" diameter plate and place it on the bottom right corner of the cape, at 4" from the bottom fold and 5.5" from the right edge. Trace a line using your pencil or chalk, and then cut the fabric 0.5" away from the line (leaving a seam allowance toward the bottom right corner).
5) At this point, you can cut a straight line across the left edge (the bottom of the cape) if needed. You can also choose to round the corners of the top and bottom of the cape if you like (I only rounded the neckline corners).
When you unfold the fabric, you'll have two identical cape-looking pieces of fabric!
Cutting and Attaching the Logo Applique
Now you can make your logo out of felt or even paint, but I wanted to make an actual fabric applique for that clean, professional look. And no, I had never made an applique before, so that means even you can do it! Here are some tips I took from Sew Like My Mom.
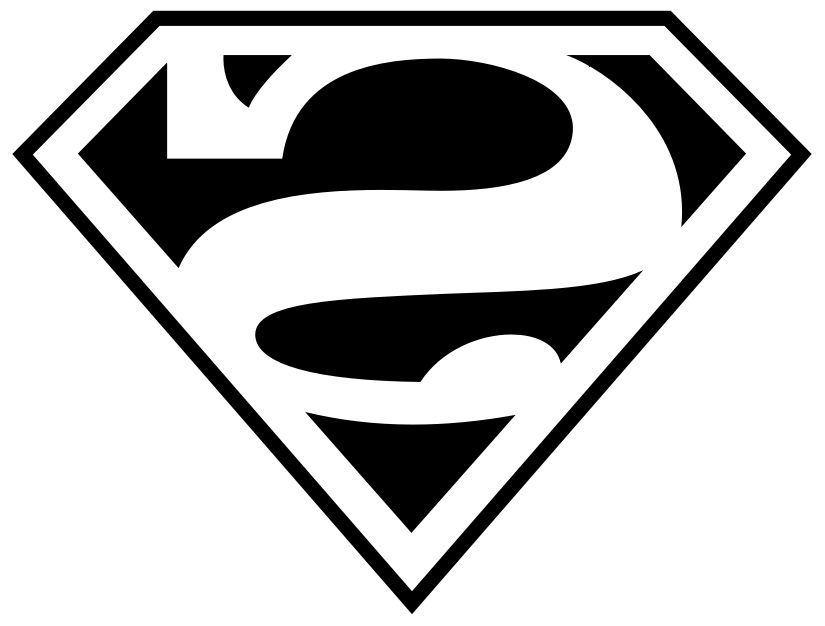
1) Find a logo that you want to copy (or make your own) and then print it out backwards at the actual size you want to use.
2) Cut out a chunk of fusible web and place it on top of the printed logo so that the shiny, slick side is facing down and the paper side is facing up. In other words, you should be tracing the logo onto the paper side of the fusible web.
Afterwards, cut out a chunk of fabric big enough for the logo and follow the directions that come with the fusible web. Remember, you should be ironing the fusible web onto the wrong side of the pressed fabric.
3) Since the Superman logo has some holes on the side, I used an X-Acto knife to make all my cuts. A metal ruler was helpful for those straight lines.
4) Once you're done cutting out the applique, flip it over. That's the logo you'll be fusing to the cape.
5) Peel off the shiny side of the fusible web and use your measuring tape to perfectly center the logo on the right side of one of the two cape pieces. (Put the other cape piece aside for now until after the applique steps have been completed.) Follow the fusible web instructions and iron the logo onto the cape piece.
6) Take out your sewing machine manual and set your machine to do a zigzag stitch that is 1/16" in width and makes 16 stitches per inch. I used a scrap piece of fabric to fiddle around with the size of my zigzag stitch until I got the machine adjusted correctly.
7) As for actually sewing the applique, read these two tutorials on the basics of sewing appliques and going around curves. Key things to remember:
- Line up the zigzag stitches with the outside edge of the applique fabric
- Don't back stitch at the beginning or end of the stitching (see above links)
- Go slowly and you'll be amazed at how perfectly it turns out
8) Once you're done, tie off the loose threads on the wrong side (aka the inside) of the cape.
Sewing and Finishing the Cape
1) Now that the applique is attached, lay the two cape pieces on top of each other with the right sides of the fabric facing each other. (In other words, the logo should be on the inside of cape fabric sandwich.) Pin the two cape pieces together.
2) Switch your sewing machine back to a regular straight stitch as recommended by your manual (don't leave it on the zigzag stitch). Sew the two cape pieces together using a 1/2" seam allowance (aka sew around the cape 1/2 an inch from the edge of the fabric). Leave a 2" opening at the bottom of the cape (see image below) so that you'll be able to turn the cape inside out at the end. Don't forget to back stitch at the beginning and end of the sewing.
3) To prevent bumps and puckering, trim the corners, clip the valleys, and notch the mountains, This tutorial from Make It & Love It illustrates this step.
4) Using the 2" opening at the bottom, turn the cape inside out so that beautiful logo appears on the outside. Do a final ironing out of wrinkles and then hand sew the gap closed using the invisible ladder stitch.
5) Cut a rectangle of Velcro off, and separate the hook and loop sides. Pin the two pieces on opposite sides of the cape's collar flaps and then try attaching the Velcro pieces together. If it works properly, the cape collar flaps should overlap slightly in the middle of the child's neck. Sew the Velcro pieces on using the sewing machine or by hand.
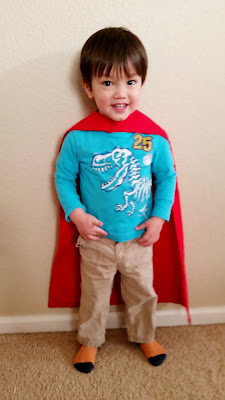
Ta da, you're done! Get ready to be rewarded with your child's ear-to-ear smiles, joyful screams, and refusal to ever take off this one-of-kind gift. Hmm, maybe another trip to the fabric store is in order... ^_~

.jpg)
.jpg)
.jpg)
.jpg)

.jpg)

.jpg)
.jpg)
.jpg)
.jpg)
.jpg)
.jpg)
.jpg)


1 comment:
The capes are for aerodynamics right ;-)
Post a Comment